

How To Install Ubuntu On External Ssd
How to create a truly portable(plug-n-play) Ubuntu installation on an external SSD/HDD
I had recently bought an internal SATA SSD(240 GB) to upgrade my spare(old) laptop only it turned out that all my onetime laptop's screw were striped hence I was unable to disassemble it, and calculation to this my new laptop didn't have any SATA slots. Initially I thought of converting this drive to an external drive by buying a enclosure and using it as a fill-in bulldoze, but then I recalled that ages ago I'd explored the idea of being able to simply plug the operating system of my choice into the USB port of a computer or laptop, and boot whatever flavor of OS I cared to. Working on a lot of ROS based projects, I wanted a portable Ubuntu installation instead of dual-booting my laptops.
I had gone through various articles/videos for this purpose, came across making your drive to be persistent through Rufus, but and then it left with an 'ugly' Install Ubuntu logo always tinkering effectually your desktop screen.
So I had followed another tutorial in which we had to plug-in our external drive while installing Ubuntu and had to allocate our external drive storage to it; which we do conventionally.
"The problem with this procedure is that the new operating system — whether on an external bulldoze or other, is now 'spring' to the computer'south principal system partition and boot data. Non only is the external drive dependent on the boot data present in the host computer organization partitions, but in most cases the computer won't boot if the external drive is removed. Not what we want."
You volition encounter the minimal-bash error to boot into Windows without the external drive connected, you can featherbed this and boot to Windows by typing in-
grub> exit 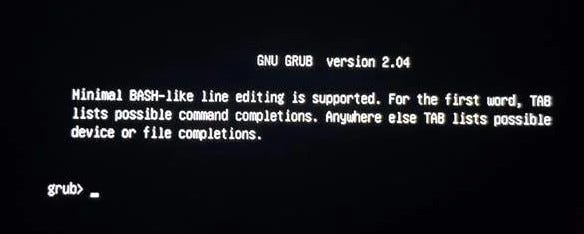
If that doesn't work you can refer-https://github.com/ventoy/Ventoy/issues/161
But the trouble that arises is whether this qualifies as a plug-n-play drive, for which the answer is definitely a NO, yous simply cannot boot your external bulldoze into some other laptop with no GRUB bootloader installed.
I went beyond a various articles and I found Anthony Bouch'due south post here- How to Create a Truly Portable Ubuntu Installation on an External Drive which was brilliant and pretty much helped in achieving the goal. Most of what follows is roughly aligned with Anthony's mail service.
These are the steps I went through for creating a truly portable bulldoze-
Requirements
- A bootable USB pen bulldoze with Ubuntu xx.04 installation media(or any other version).You tin create this from your Windows estimator past Rufus. A brief tutorial is available- Create a bootable USB stick on Windows Ubuntu.
- An empty external hard drive (HDD, SATA SSD, K.2 NVMe SSD etc.)
- Patience and as well backup your data elsewhere
Getting Started
Booting into Ubuntu
At present information technology is time to plug in the flashed USB drive and restart your calculator. When the splash screen of your computer'southward manufacturer appears, yous need to press either F1, F2, F12, ESC or DEL on your keyboard to enter the BIOS menu of your computer. Which key to press depends on the make of your computer. Your computer might fifty-fifty tell you which key to press. Else, yous might need to expect it up either in the manual of your computer on online.
Once you entered your BIOS, you demand to find the choice to change the boot order. The BIOS of each motherboard tin can be slightly different. You need to navigate through information technology by yourself to find the option to modify the boot order. When you discover it, y'all should identify the entry for USB devices on the commencement position and then when yous restart the computer it will automatically boot from the USB stick with the Ubuntu installation media.
Preparing the drive — GParted
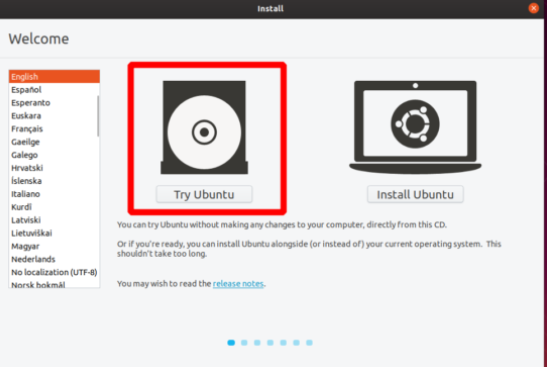
- In one case y'all have booted into Ubuntu, cull 'Try Ubuntu'
- Now you can connect your external drive to your PC.
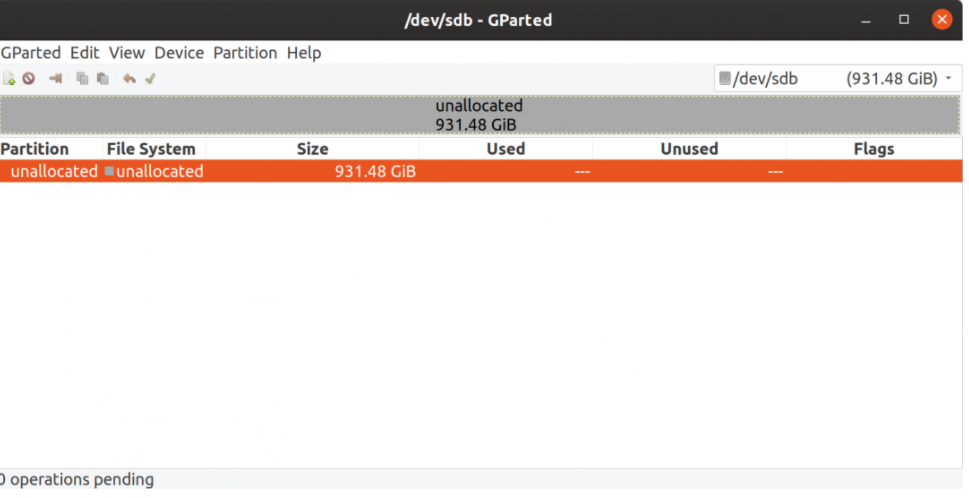
- Go to Application Director and search for GParted. Once GParted is started — in the upper correct corner, change the target drive to your external portable drive. It's important that you lot correctly place this drive as we're going to re-partition the drive. In the screenshot below — my external and portable drive is identified every bit /dev/sdb — and it is currently unpartitioned. Unmount (right click and unmount) any currently mounted partitions on this drive and delete all partitions (once more — be double sure y'all're working on the right drive).
- Again using GParted, right click on the unallocated volume, choose New, and create a 100MB fat32 partition. Click on the light-green checkmark to apply the awaiting operation. One time the sectionalisation has been created — right click on the newly created sectionalization and select 'Manage Flags'. Enable the boot and esp flags.
- Classify around 8 GB(equivalent to RAM) for linux-bandy space, then create a root / or master partition for our target portable drive. Create an ext4 partition of whatsoever size you require for your arrangement.

- Click on the individual sectionalisation and jot down the partition locations and its respective UUIDs. For eg. For the FAT32 segmentation in my case, its location was /dev/sdb1 and UUID was 3308–418D.
Installing Ubuntu
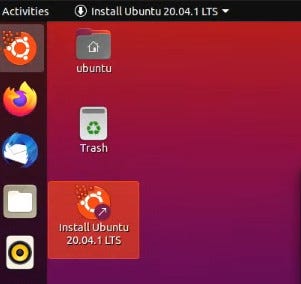
Now, you tin can click on Install Ubuntu icon, and continue towards installing until you see the 'Installation Blazon' window
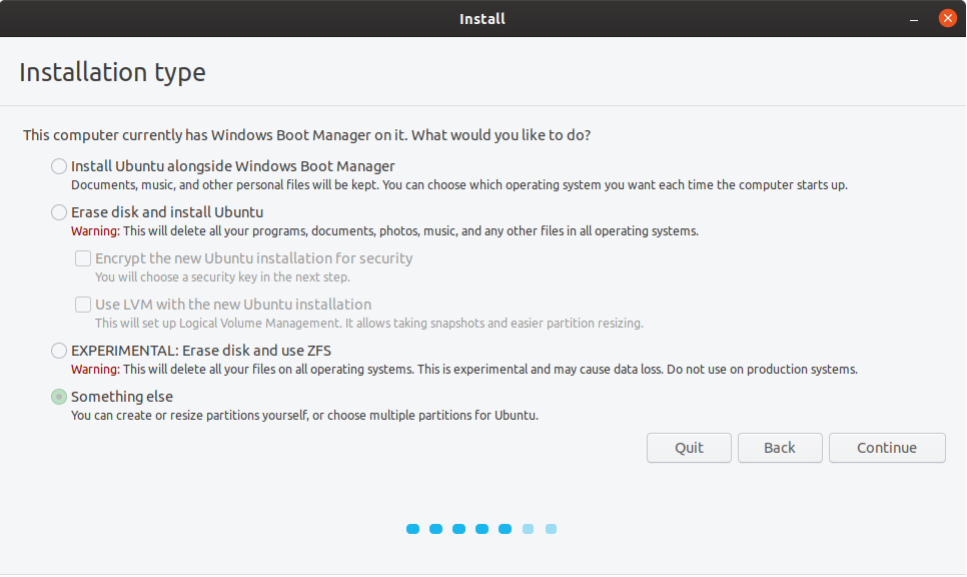
Click on 'Something else' and proceed
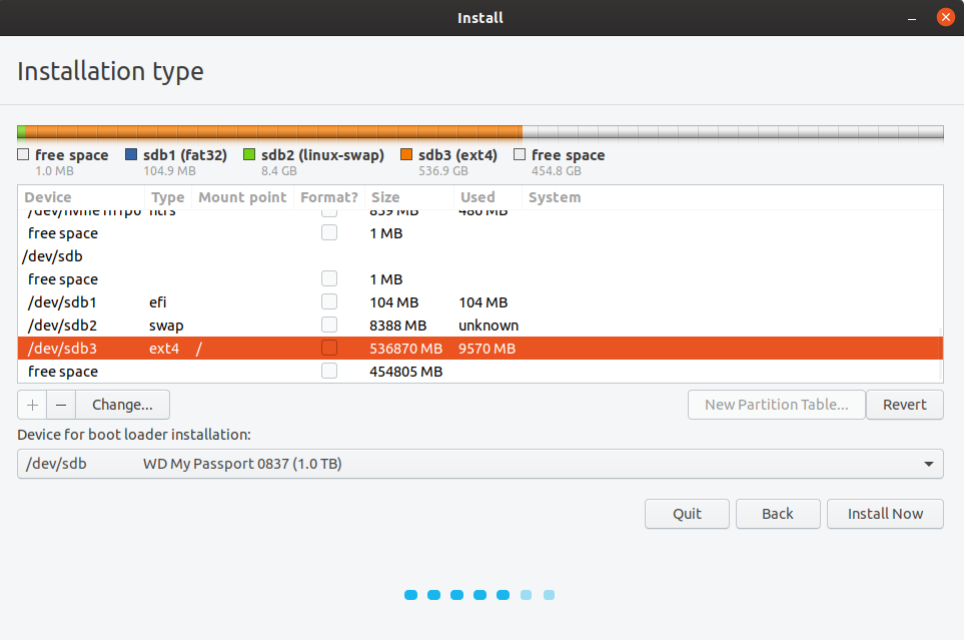
Now that we're on the 'Something else' installation type screen — coil downwards the list of available bulldoze volumes until yous see your device and the partitions nosotros previously created. In this case /dev/sdb1, /dev/sdb2, and /dev/sdb3.
- Double click on the 100MB fat32 system efi partition nosotros created (/dev/sdb1)and cull 'Utilize as EFI system sectionalization' but do not format the segmentation.
- Double click on the /dev/sdb2 partitioning and choose 'Use as swap area'.
- Then double click on the /dev/sdb3 partition — and choose utilize as 'Ext4 journaling file system', and ready the mountain point to / or root, and again practise non format this sectionalization.
- Lastly — select the 'Device for kick loader installations:' to the proper name of the device for your external hard drive
With this continue with your installation.
Installing Chow on your drive
With this your bootloader will exist installed in your local PC, just for it to be installed in your external drive nosotros volition accept to follow certain steps.
With your bootable flash drive connected, boot again to Ubuntu, click on 'Attempt Ubuntu' every bit done previously, now proceed to GParted and wait into your external drive locations, if in that location is some modify(UUID and location) you can jot it down, will be used later.
Now Open up Terminal(Ctrl+Alt+T), in your terminal yous volition have to execute these certain commands.
sudo umount /media/ubuntu/<the uuid of your root sectionalization> Now we'll mount our new Ubuntu installation root book from our external drive.
sudo mount /dev/sdb3 /mnt Note: Edit this with your root location
sudo nano /mnt/etc/fstab Copy and then comment the line with the /kicking/efi mount signal. In your new line replace the electric current UUID with the one from in a higher place - in this case 3308–418D(UUID of FAT32)
sudo mount /dev/sdb1 /mnt/boot/efi Notation: Edit this with your FAT32 location
At present implement these commands
          sudo mount -B /dev /mnt/dev
sudo mount -B /dev/pts /mnt/dev/pts
sudo mount -B /proc /mnt/proc
sudo mount -B /sys /mnt/sys
Next we'll copy over our current DNS settings just in case we need network admission
sudo cp /etc/resolv.conf /mnt/etc/ Side by side we load efivars. The modprobe efivars command loads the efivars kernel module, which gives the kernel access to EFI variables stored in NVRAM
modprobe efivars Finally we'll switch into a chroot environment in our simulated OS on the external difficult drive.
sudo chroot /mnt And at present afterward all that, we're ready to install Grub. As with all of the instructions higher up, be sure to alter /dev/sdb with your own external drive device identifier.
chow-install -d /usr/lib/grub/x86_64-efi --efi-directory=/kicking/efi/ --removable /dev/sdb Voilà! Your external device is at present a truly portable drive
Cleaning up your dual kicking configuration
With this you have a plug-due north-play external drive but you will encounter the minimal-bash mistake once again when you lot volition like to boot into Windows (your external drive is not connected), so why were doing such a long procedure, if we couldn't solve information technology, we did this long method simply to install grub in our external drive, as grub bootloader usually gets installed in our local device(Bone) also;
And then our side by side step would be remove this bootloader from Windows.
For this you will have to boot into Windows.
- Run Command Prompt as Administrator
diskpart Start the 'DiskPart' disk sectionalisation utility and list disks
list disk Choose the hard deejay that is your primary boot hard bulldoze for this computer. Likely disk 0
select disk 0 Prove the partitions on this disk
list partition Select the 'System' partition
select segmentation 1 Assign a free drive letter to this partition
assign letter=Z: Get out DiskPart and modify to the Z: drive Change into the EFI directory and remove the ubuntu sub-directory using:
get out Z: rmdir /south ubuntu
You can also refer this video -
Reboot your figurer once more, and your Windows installation should 'merely start' as before — without any prompts from Grub or whatsoever sign of 'dual boot'.
You will now be able to directly kicking into whatsoever laptop with your external hard drive.
Special Cheers to Anthony Bouch again- without his commodity I couldn't have done this.

Source: https://medium.com/@abrarahmedsyed/how-to-create-a-truly-portable-plug-n-play-ubuntu-installation-on-an-external-ssd-hdd-7aaadc7d796a
Posted by: stopsawallaid.blogspot.com
0 Response to "How To Install Ubuntu On External Ssd"
Post a Comment